Introduction
Generic pnp monitor problem on windows 10 fixed : Generic PnP Monitor Problem,” you’re not alone. This issue is quite common and can lead to screen resolution and display-related difficulties. The Generic PnP Monitor problem arises when your computer fails to recognize the connected monitor correctly, resulting in restricted display settings and other related problems. In this article, we will explore various solutions to fix this issue and regain optimal display functionality on your Windows 10 system.
Understanding the Generic PnP Monitor Issue
The Generic PnP Monitor issue occurs when the operating system cannot identify the monitor’s specific hardware details, and instead, it assigns a generic driver to it. Consequently, this may lead to incorrect display settings, limited screen resolutions, and the inability to utilize the monitor’s full potential.
Check for Physical Connections and Cables
Before diving into software-related solutions, it’s essential to verify the physical connections and cables between your monitor and the computer. Ensure that all connections are secure and that there are no loose cables. Sometimes, a loose connection can cause communication errors and result in the Generic PnP Monitor problem.
Update Graphics Drivers
Outdated or corrupted graphics drivers are a common cause of the Generic PnP Monitor problem. To resolve this, you can update the graphics drivers to the latest version. Follow these steps:
- Right-click on the “Start” button and select “Device Manager.”
- Expand the “Display adapters” section and right-click on your graphics card.
- Select “Update driver” and choose the option to search automatically for updated driver software.
Rollback or Uninstall Recent Updates
If the Generic PnP Monitor problem appeared shortly after a recent update, the update might be the culprit. You can try rolling back the update or uninstalling it to see if the issue resolves.
- Go to “Settings” and click on “Update & Security.”
- Select “Windows Update” and click on “View update history.”
- Click on “Uninstall updates” and locate the recent update.
- Right-click on the update and choose “Uninstall.”
Adjust Screen Resolution and Refresh Rate
Incorrect screen resolution and refresh rate settings can lead to display issues. To adjust these settings, follow these steps:
- Right-click on the desktop and select “Display settings.”
- Under the “Display resolution” section, select the appropriate resolution for your monitor.
- Scroll down and click on “Advanced display settings.”
- Adjust the refresh rate to the recommended value.
Run Hardware and Device Troubleshooter
Windows 10 comes with built-in troubleshooting tools that can help identify and fix hardware-related issues. Running the Hardware and Device Troubleshooter might help in resolving the Generic PnP Monitor problem.
- Right-click on the “Start” button and select “Settings.”
- Go to “Update & Security” and click on “Troubleshoot” from the left pane.
- Select “Hardware and Devices” and click on “Run the troubleshooter.”
Enable Generic PnP Monitor
Sometimes, the Generic PnP Monitor might be disabled in the device manager. Enabling it can potentially resolve the issue.
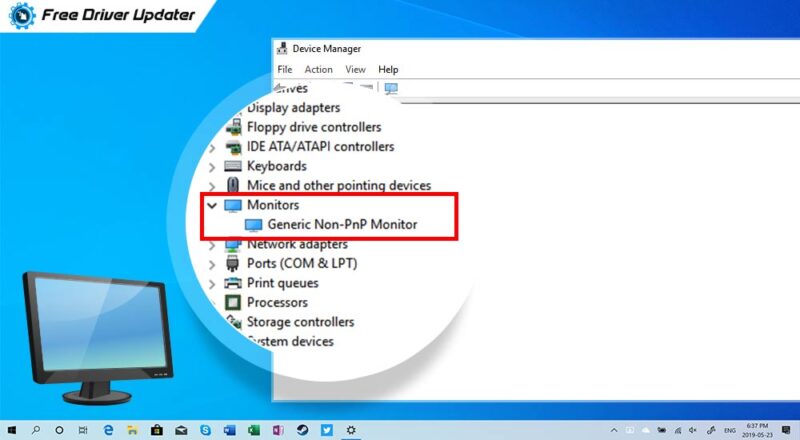
- Right-click on the “Start” button and select “Device Manager.”
- Expand the “Monitors” section, right-click on “Generic PnP Monitor,” and choose “Enable device.”
Install Manufacturer’s Monitor Driver
Visit the manufacturer’s website and download the specific monitor driver for your model. Installing the official driver can fix compatibility issues and resolve the Generic PnP Monitor problem.
Use Third-Party Software to Fix the Issue
There are third-party software solutions available that can automatically detect and fix display-related problems, including the Generic PnP Monitor issue. These tools can save time and effort in troubleshooting.
Check for System File Corruption
Corrupted system files can lead to various problems, including the Generic PnP Monitor issue. Use the built-in System File Checker tool to scan and repair corrupted files.
- Open the Command Prompt as an administrator.
- Type “sfc /scannow” and press Enter.
Disable Hardware Acceleration
In some cases, hardware acceleration settings can cause conflicts with display drivers, leading to the Generic PnP Monitor problem. Try disabling hardware acceleration in your applications and see if that resolves the issue.
Perform a System Restore
If the Generic PnP Monitor problem started after recent changes, performing a system restore can revert your computer to a previous state when the issue was not present.
- Type “System Restore” in the Windows search bar and select “Create a restore point.”
- Click on “System Restore” and follow the on-screen instructions.
Reinstall Windows 10
If none of the above solutions work, reinstalling Windows 10 can be the last resort to fix the Generic PnP Monitor problem. Remember to back up your important files before proceeding with this step.
Conclusion
The Generic PnP Monitor problem can be frustrating, but with the right approach, it is solvable. By checking physical connections, updating drivers, adjusting settings, and using troubleshooting tools, you can resolve the issue and enjoy a seamless display experience on your Windows 10 computer.
FAQs
-
Q: Why is my monitor showing “Generic PnP Monitor”?
- A: The “Generic PnP Monitor” message indicates that your operating system doesn’t recognize the specific monitor’s details and assigns a generic driver.
-
Q: How do I update my graphics drivers on Windows 10?
- A: To update graphics drivers, right-click on the “Start” button, select “Device Manager,” expand “Display adapters,” right-click on your graphics card, and choose “Update driver.”
-
Q: Can a faulty HDMI cable cause the Generic PnP Monitor issue?
- A: Yes, a faulty HDMI cable or loose connection between the monitor and the computer can cause communication errors and trigger the issue.
-
Q: What is hardware acceleration, and how do I disable it?
- A: Hardware acceleration uses the computer’s hardware to perform specific tasks. To disable it, go to the settings of the application using it and look for options related to hardware acceleration.
-
Q: Will reinstalling Windows 10 delete my files?
- A: Yes, reinstalling Windows 10 will erase all files on the system drive, so make sure to back up your important data before proceeding.